
Distressed Stencilling
I am so excited to show you this painting technique! I discovered it from my new friend, Josi Siefker. Josi is a Cece Caldwell’s All Natural Chalk + Clay Paints retailer as well! Visit her next time you are in Las Vegas, or check her Facebook page: Vintage Home
I was so intrigued when she showed this in the end of Paris Flea Market Fundraiser – you can read all about the event at Redoux!
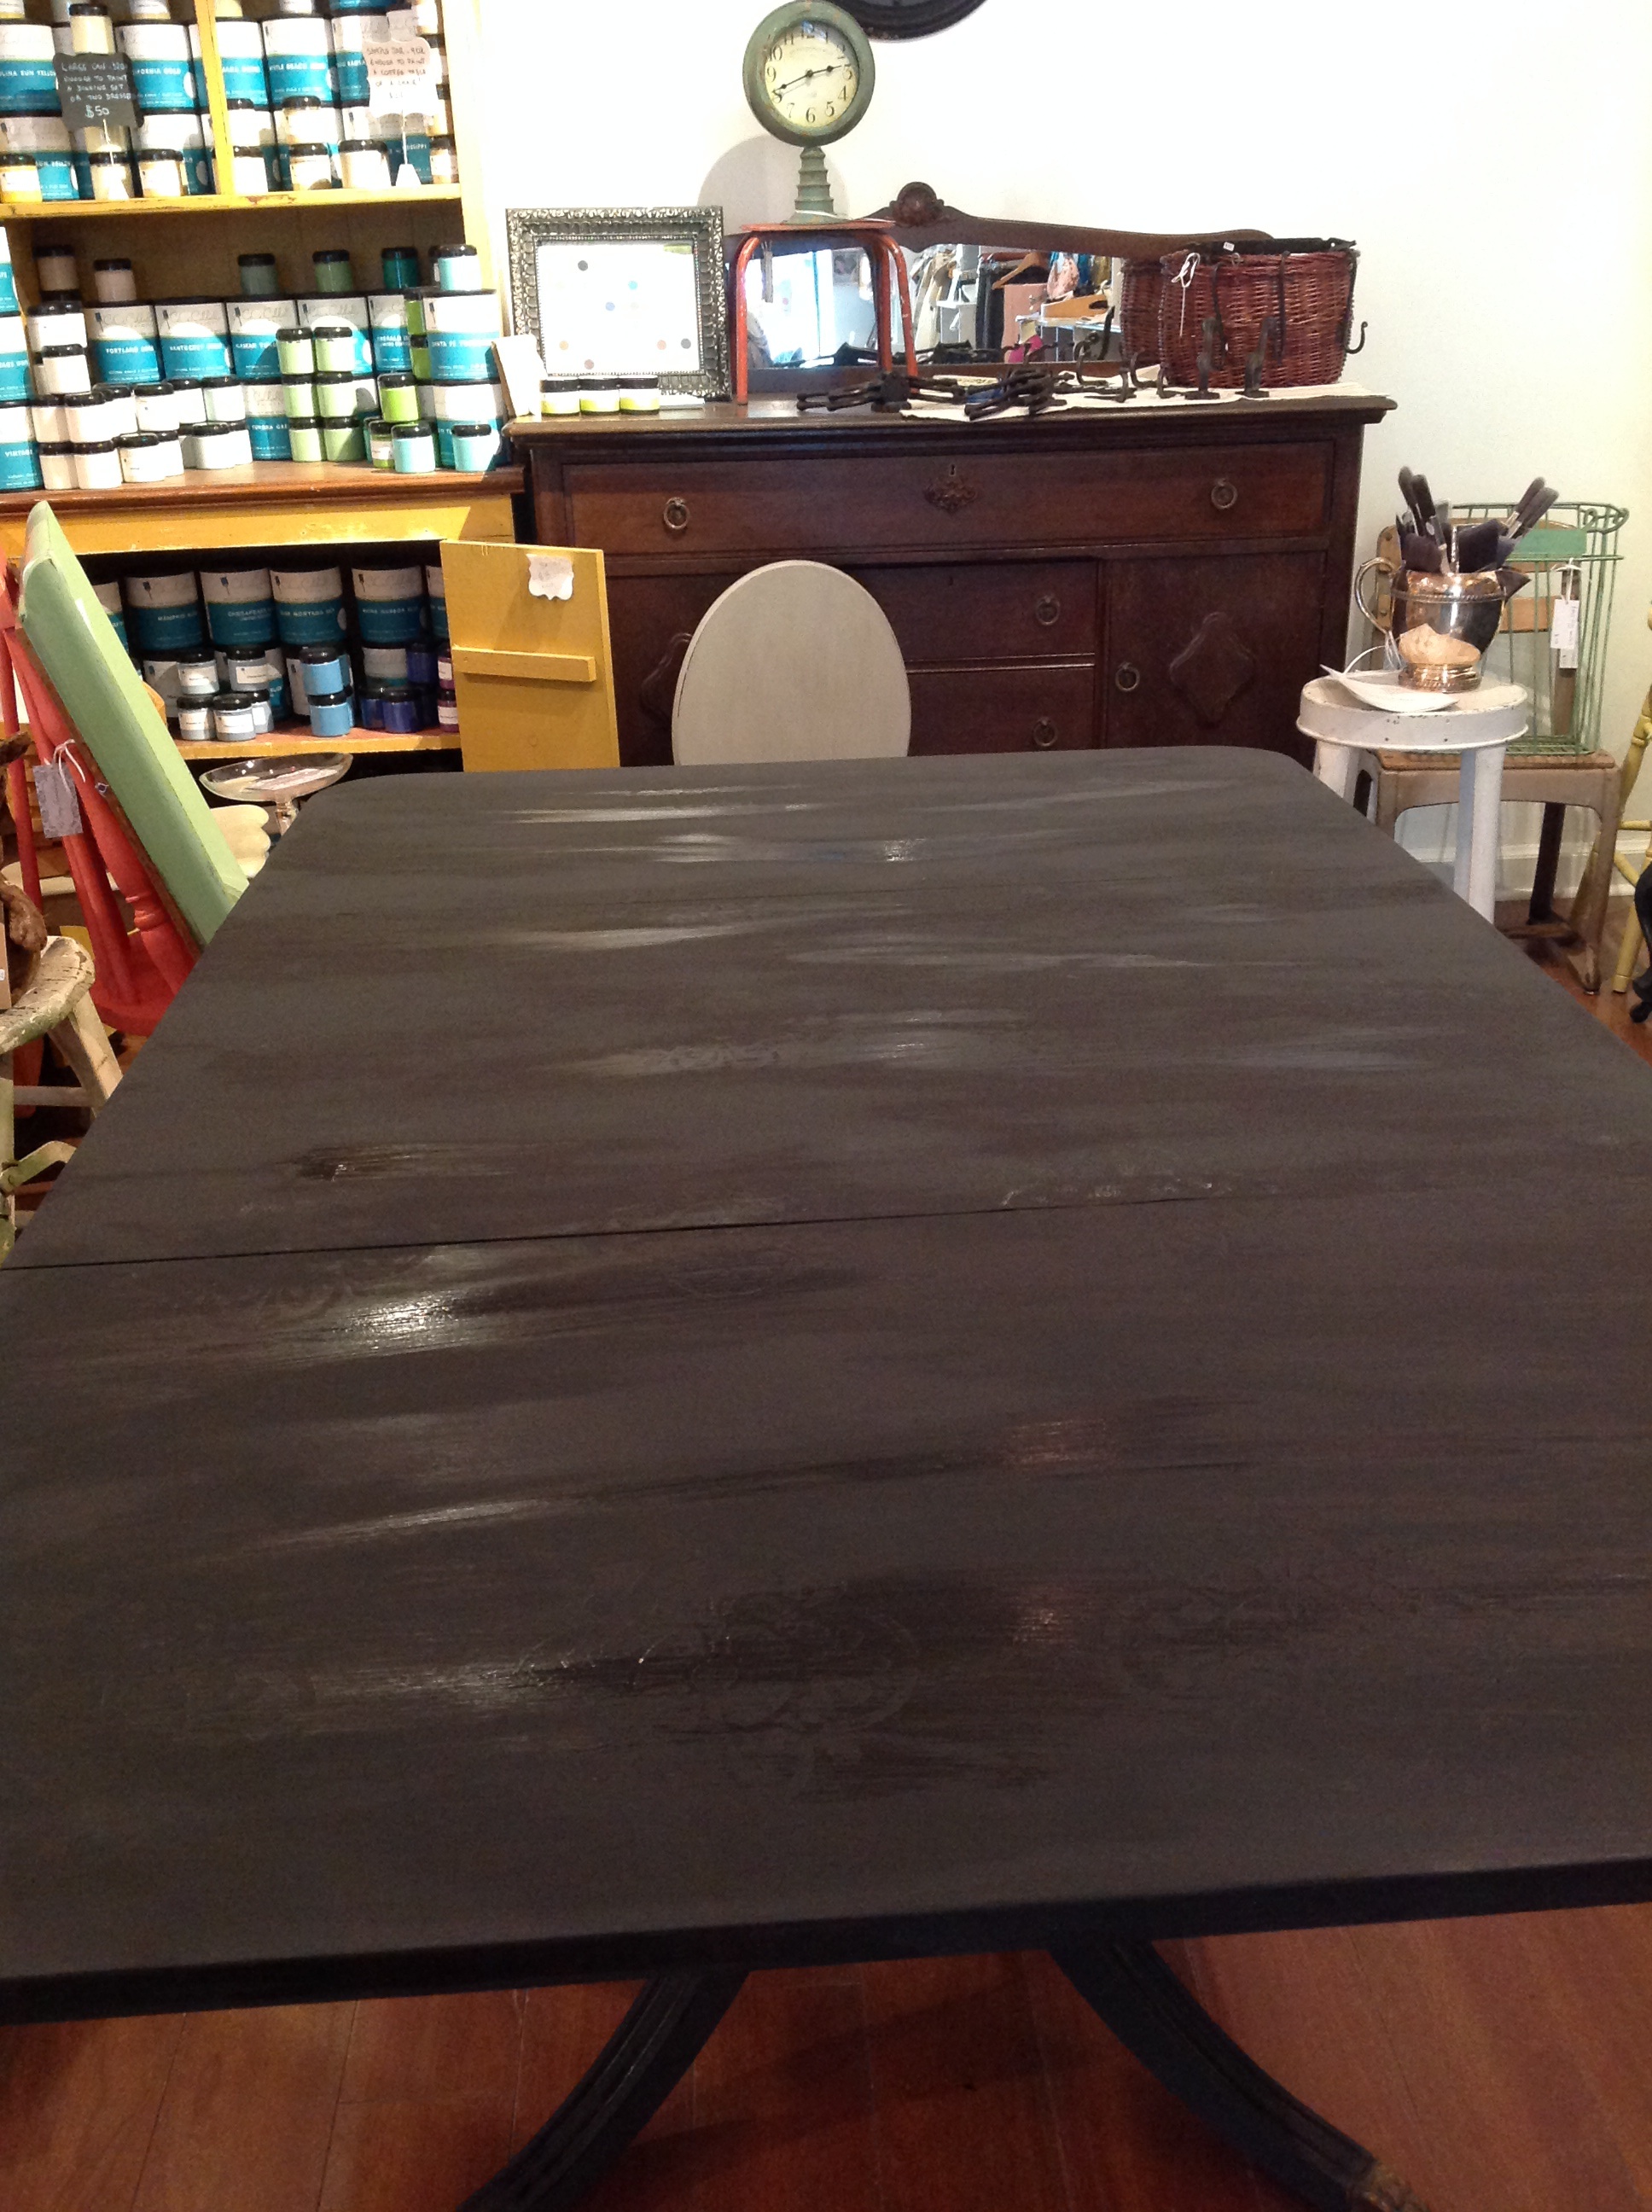
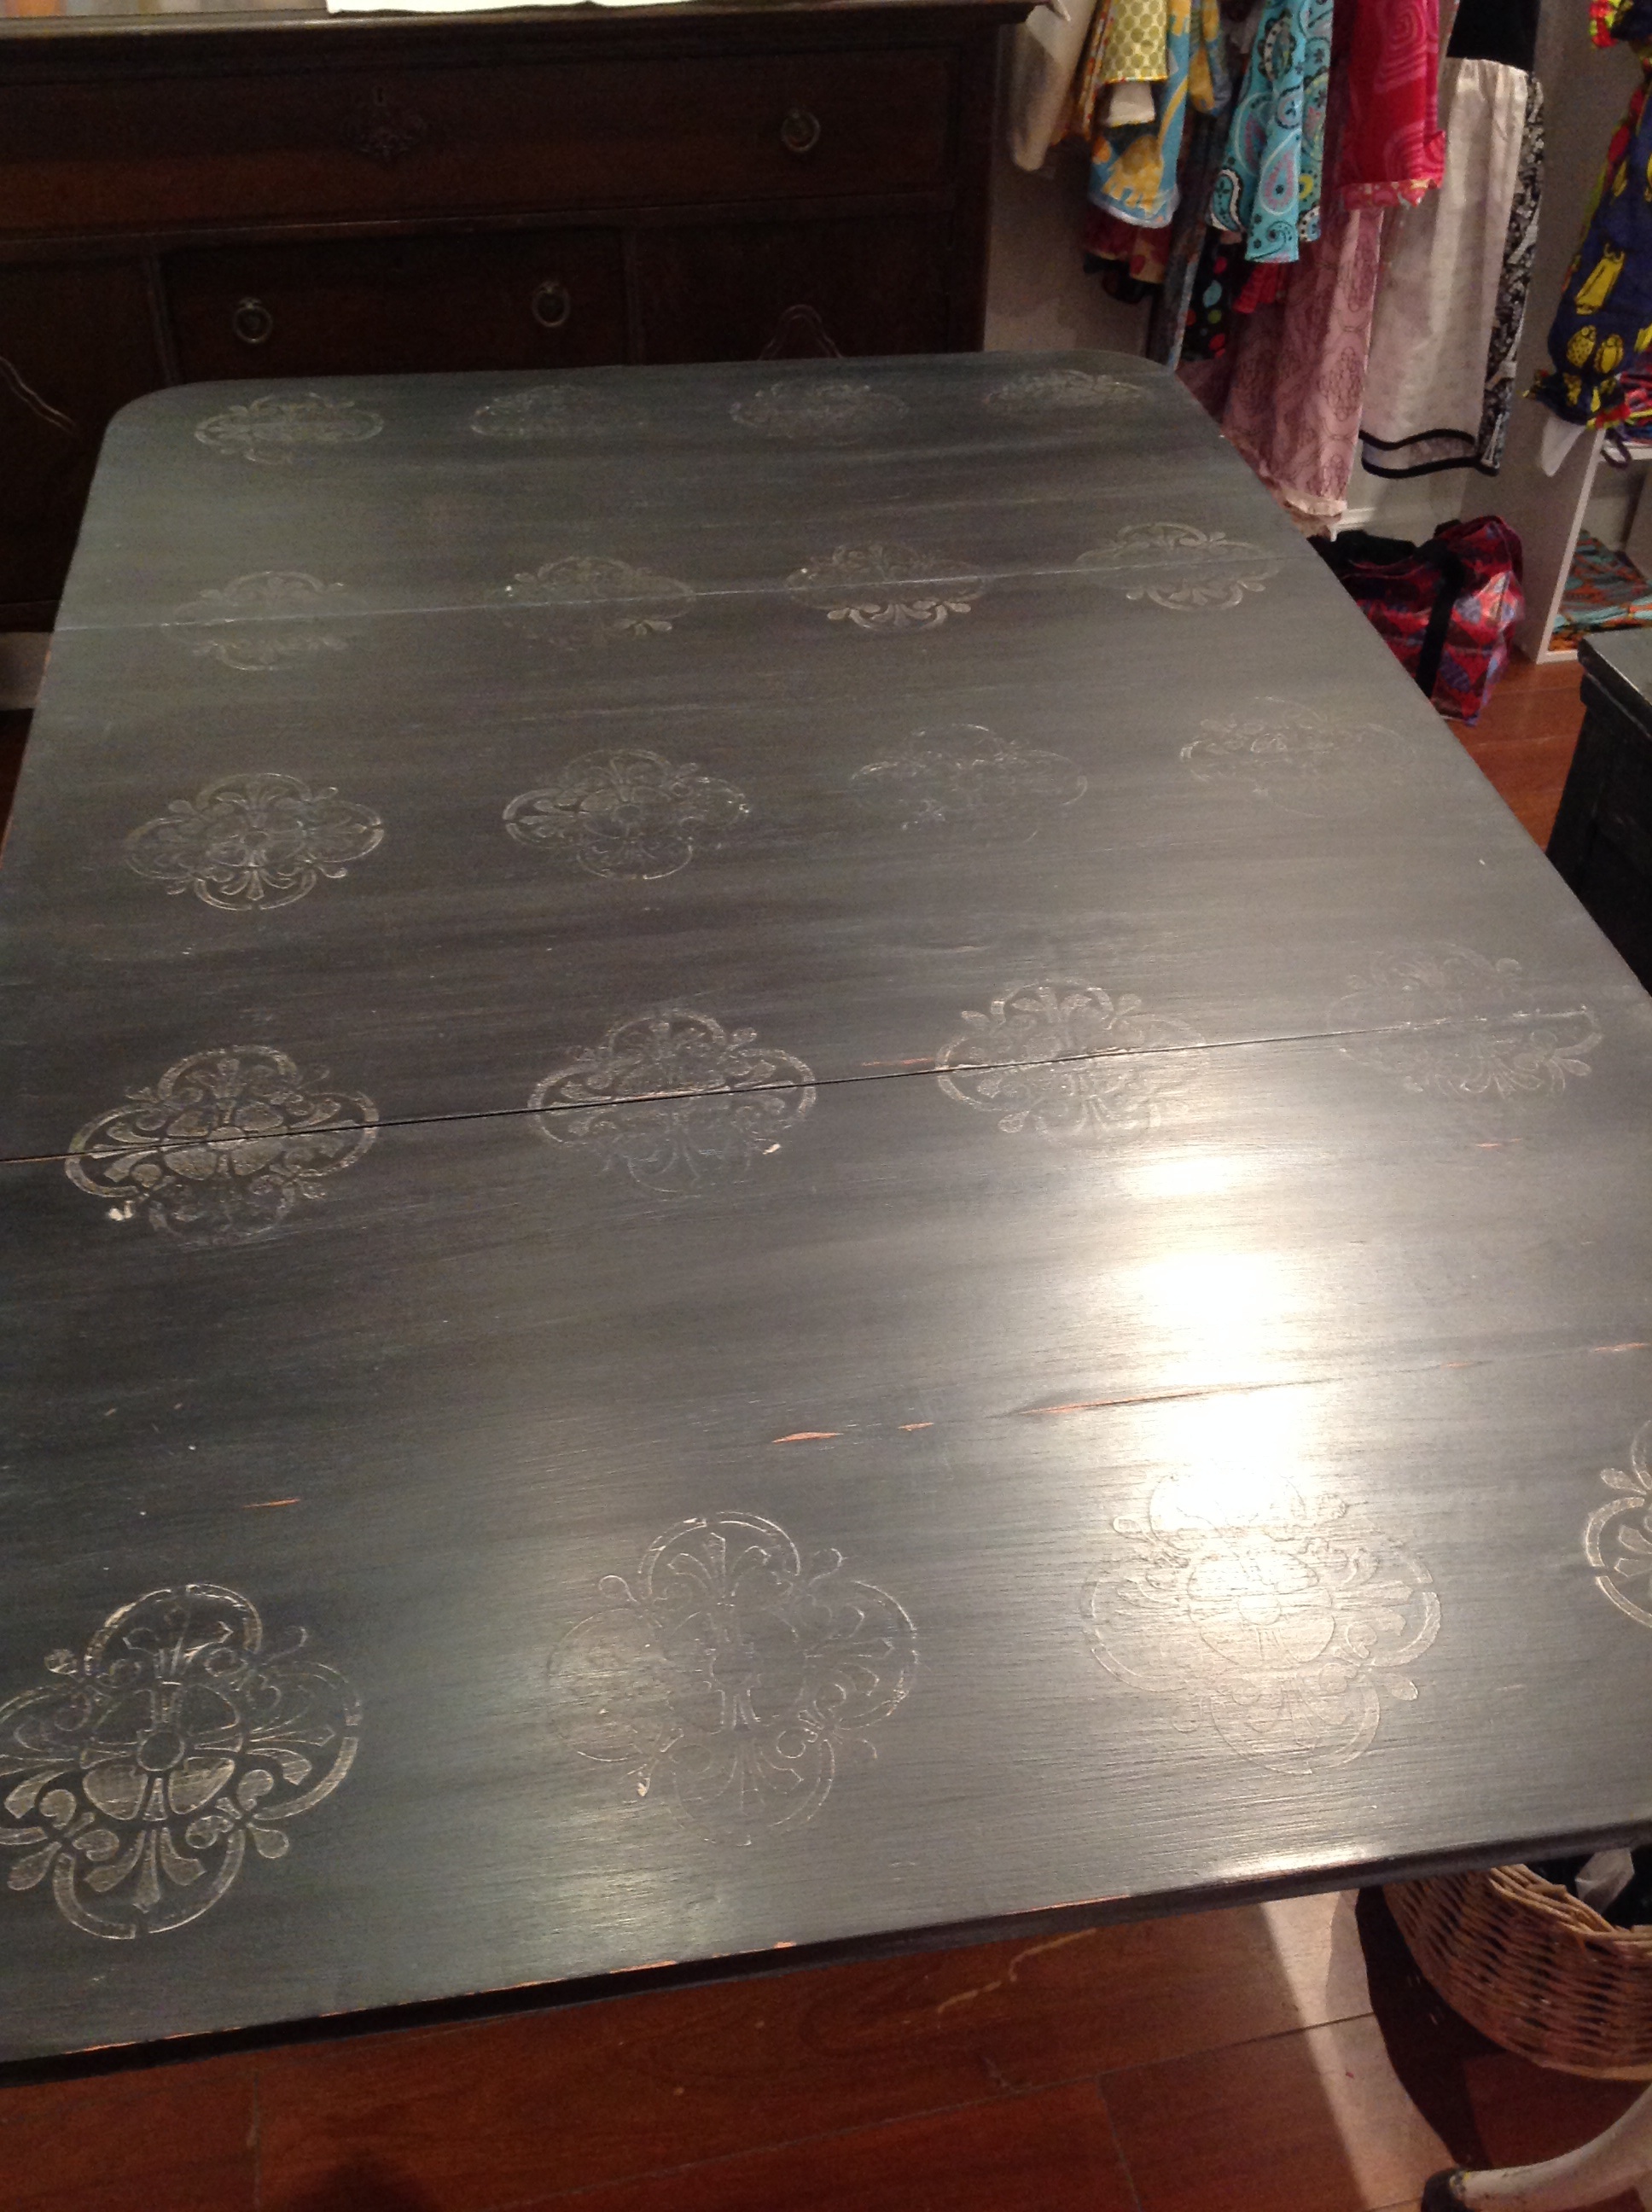
I decided to paint this old Duncan Phyfe drop-leaf table and try it out!
First, I painted the whole table with Cece Caldwell’s Beckley Coal (BLACK). I turned the table upside down and painted it all before painting the top.
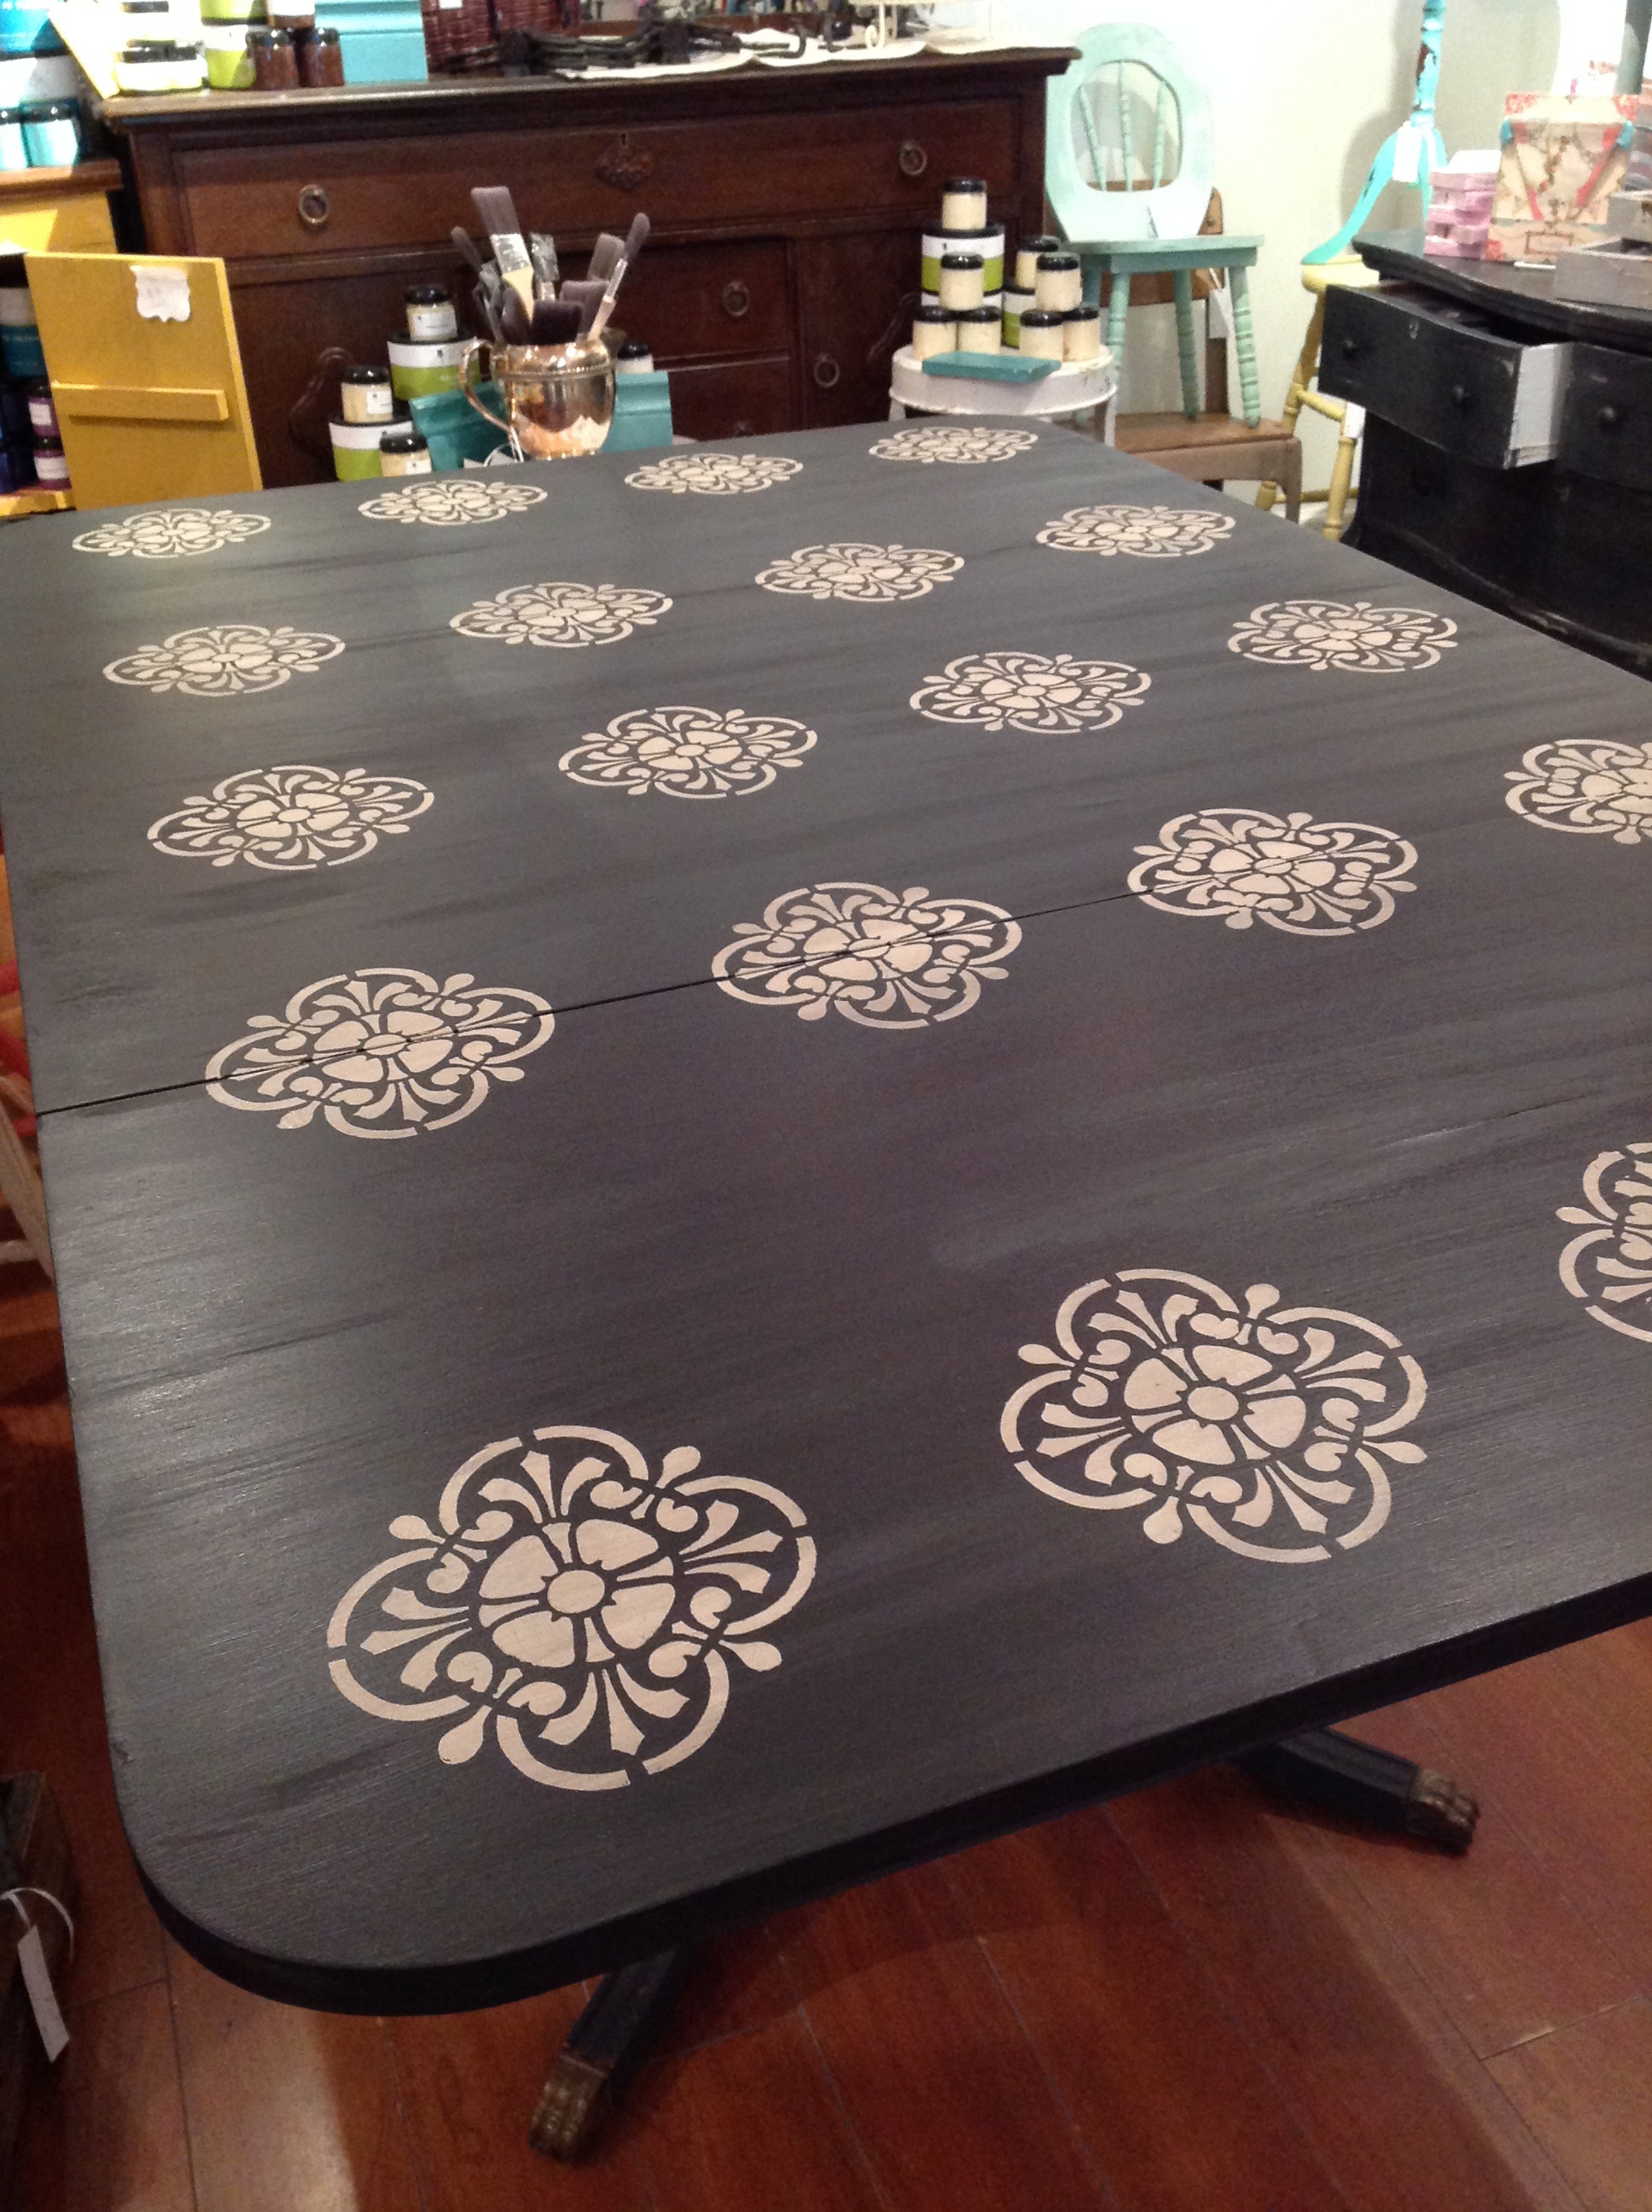
I stenciled the table with a regular stencil I found at Michael’s , just “eye-balling” it. I used Cece Caldwell’s Young Kansas Wheat.
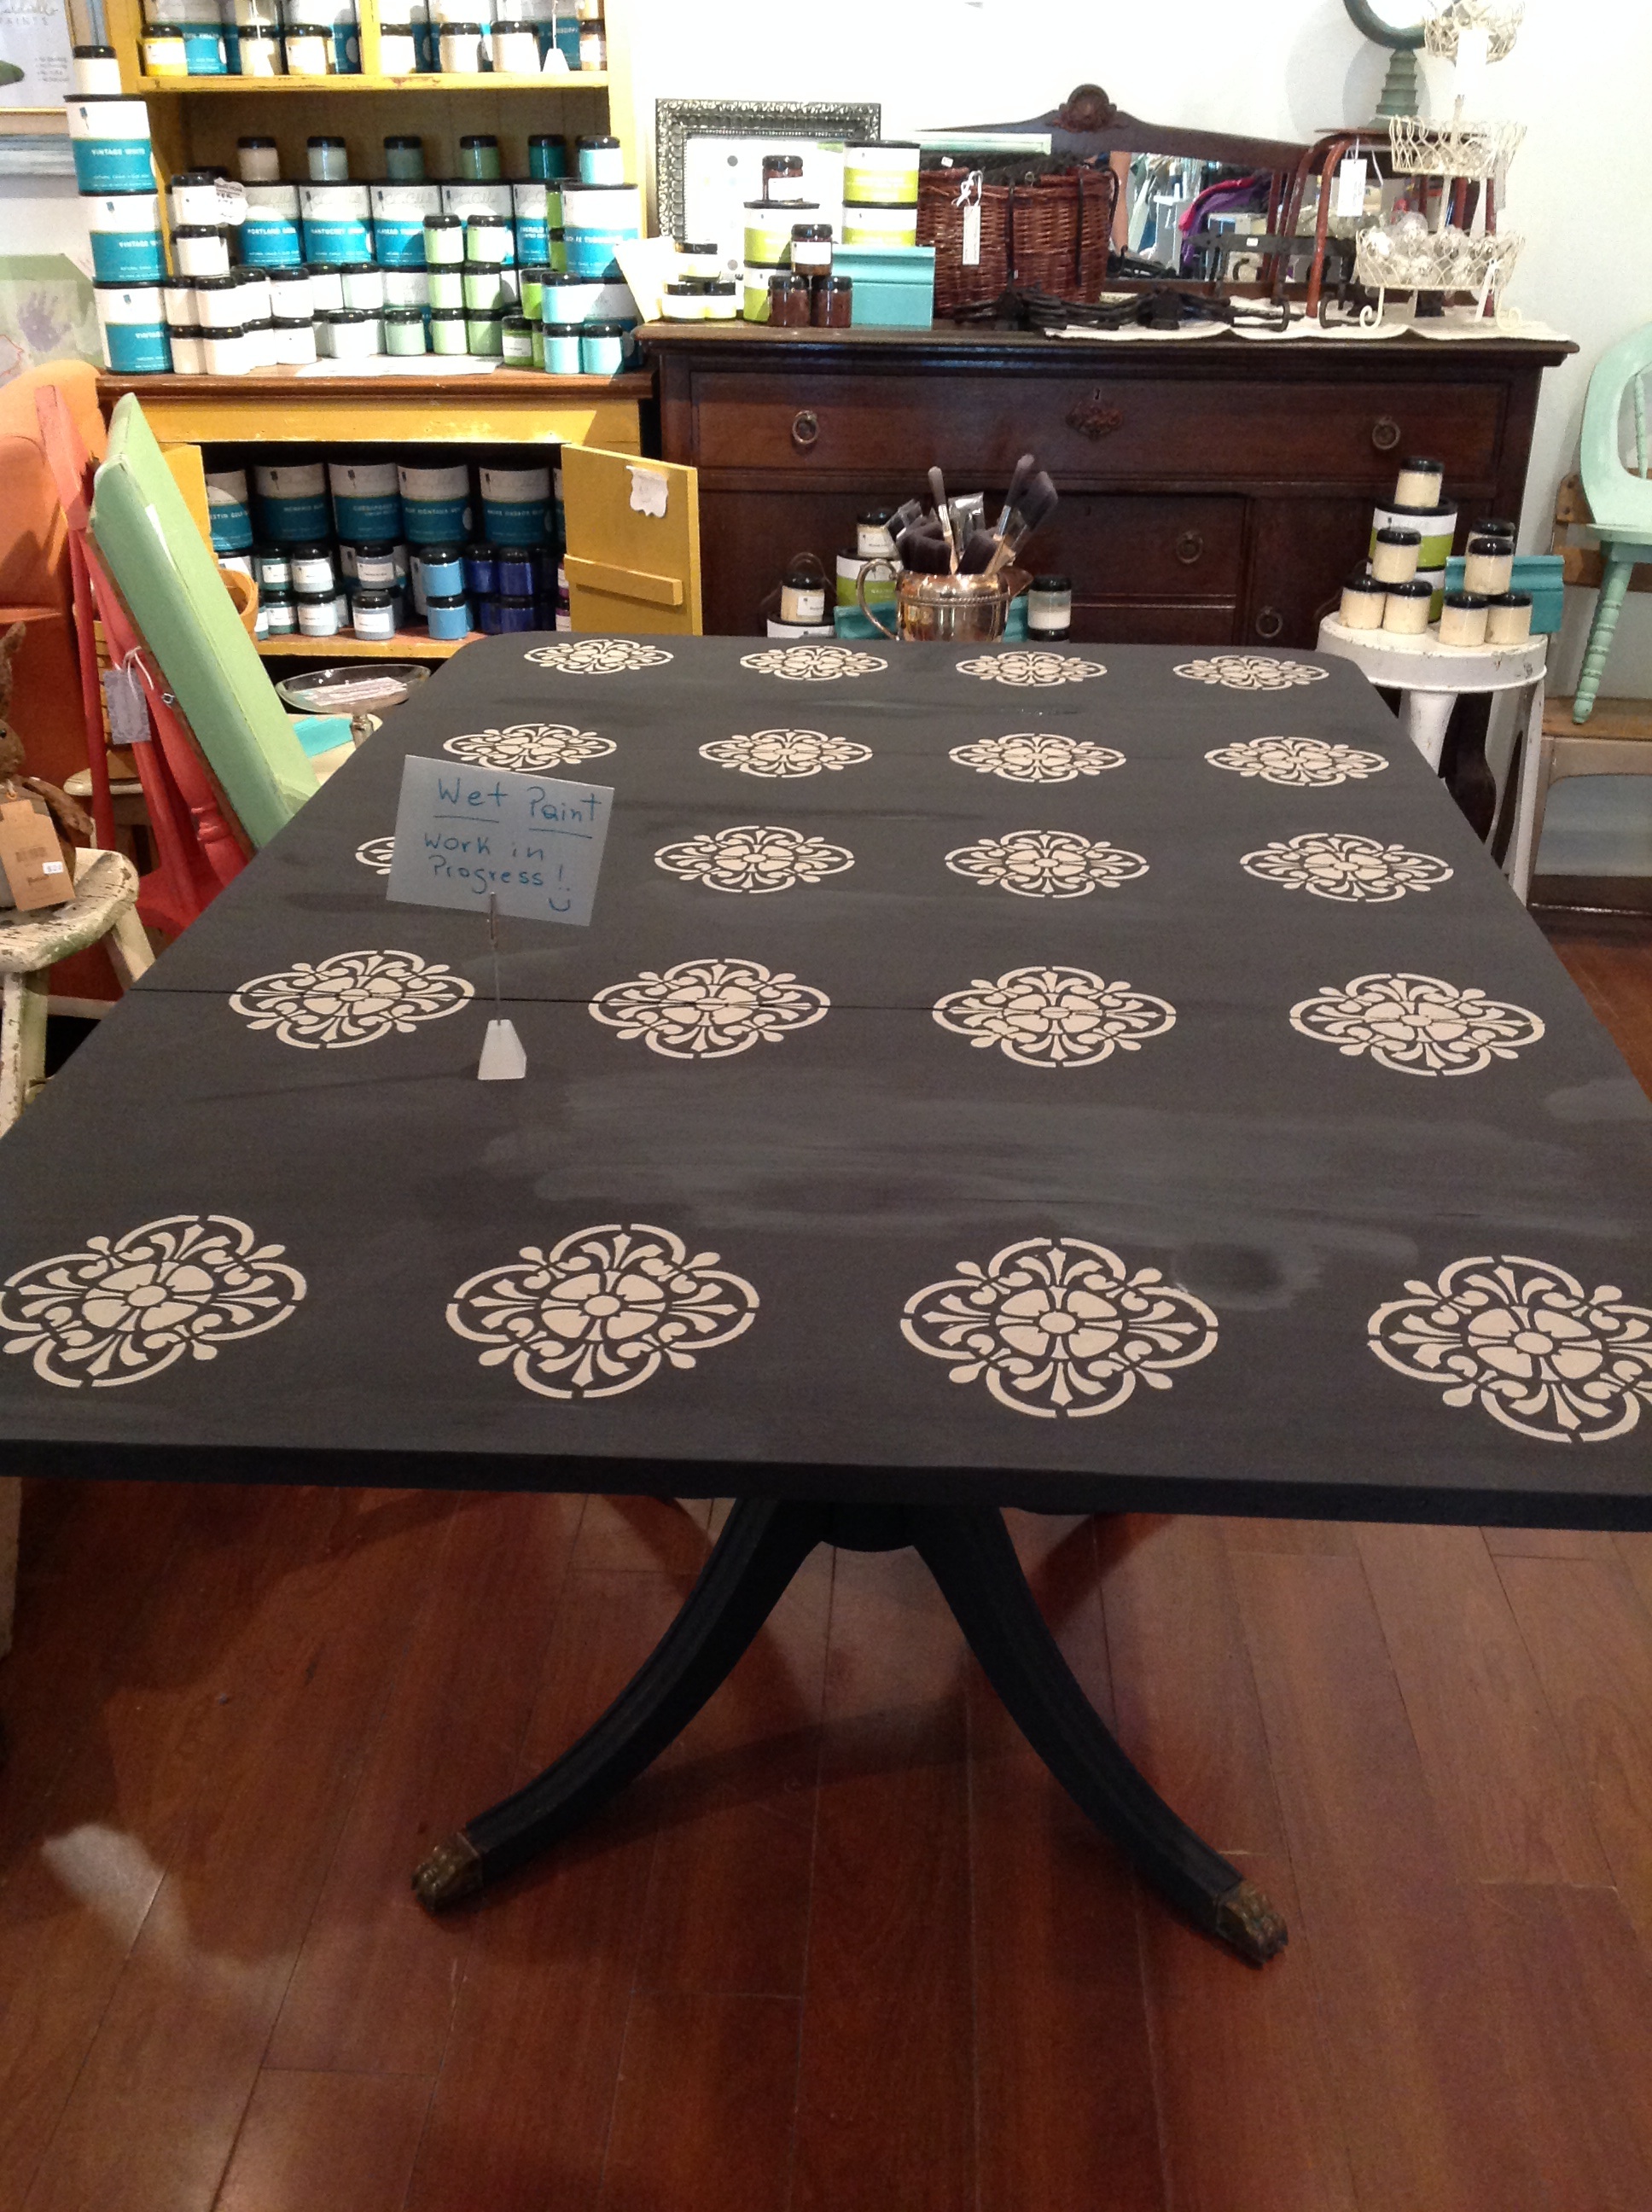
Once the paint was dry, I SEALED it with Satin Finish. I apply my Satin Finish with a foam brush, in a THIN layer. You just apply it and it is done. But not in this technique!
I was painting this table at the shop, so I worked on it every time I had a shift (I share the space with other local business, check In Good Company Shop). On my next shift, I painted it ALL in Beckley Coal again! So I covered all the stencils!
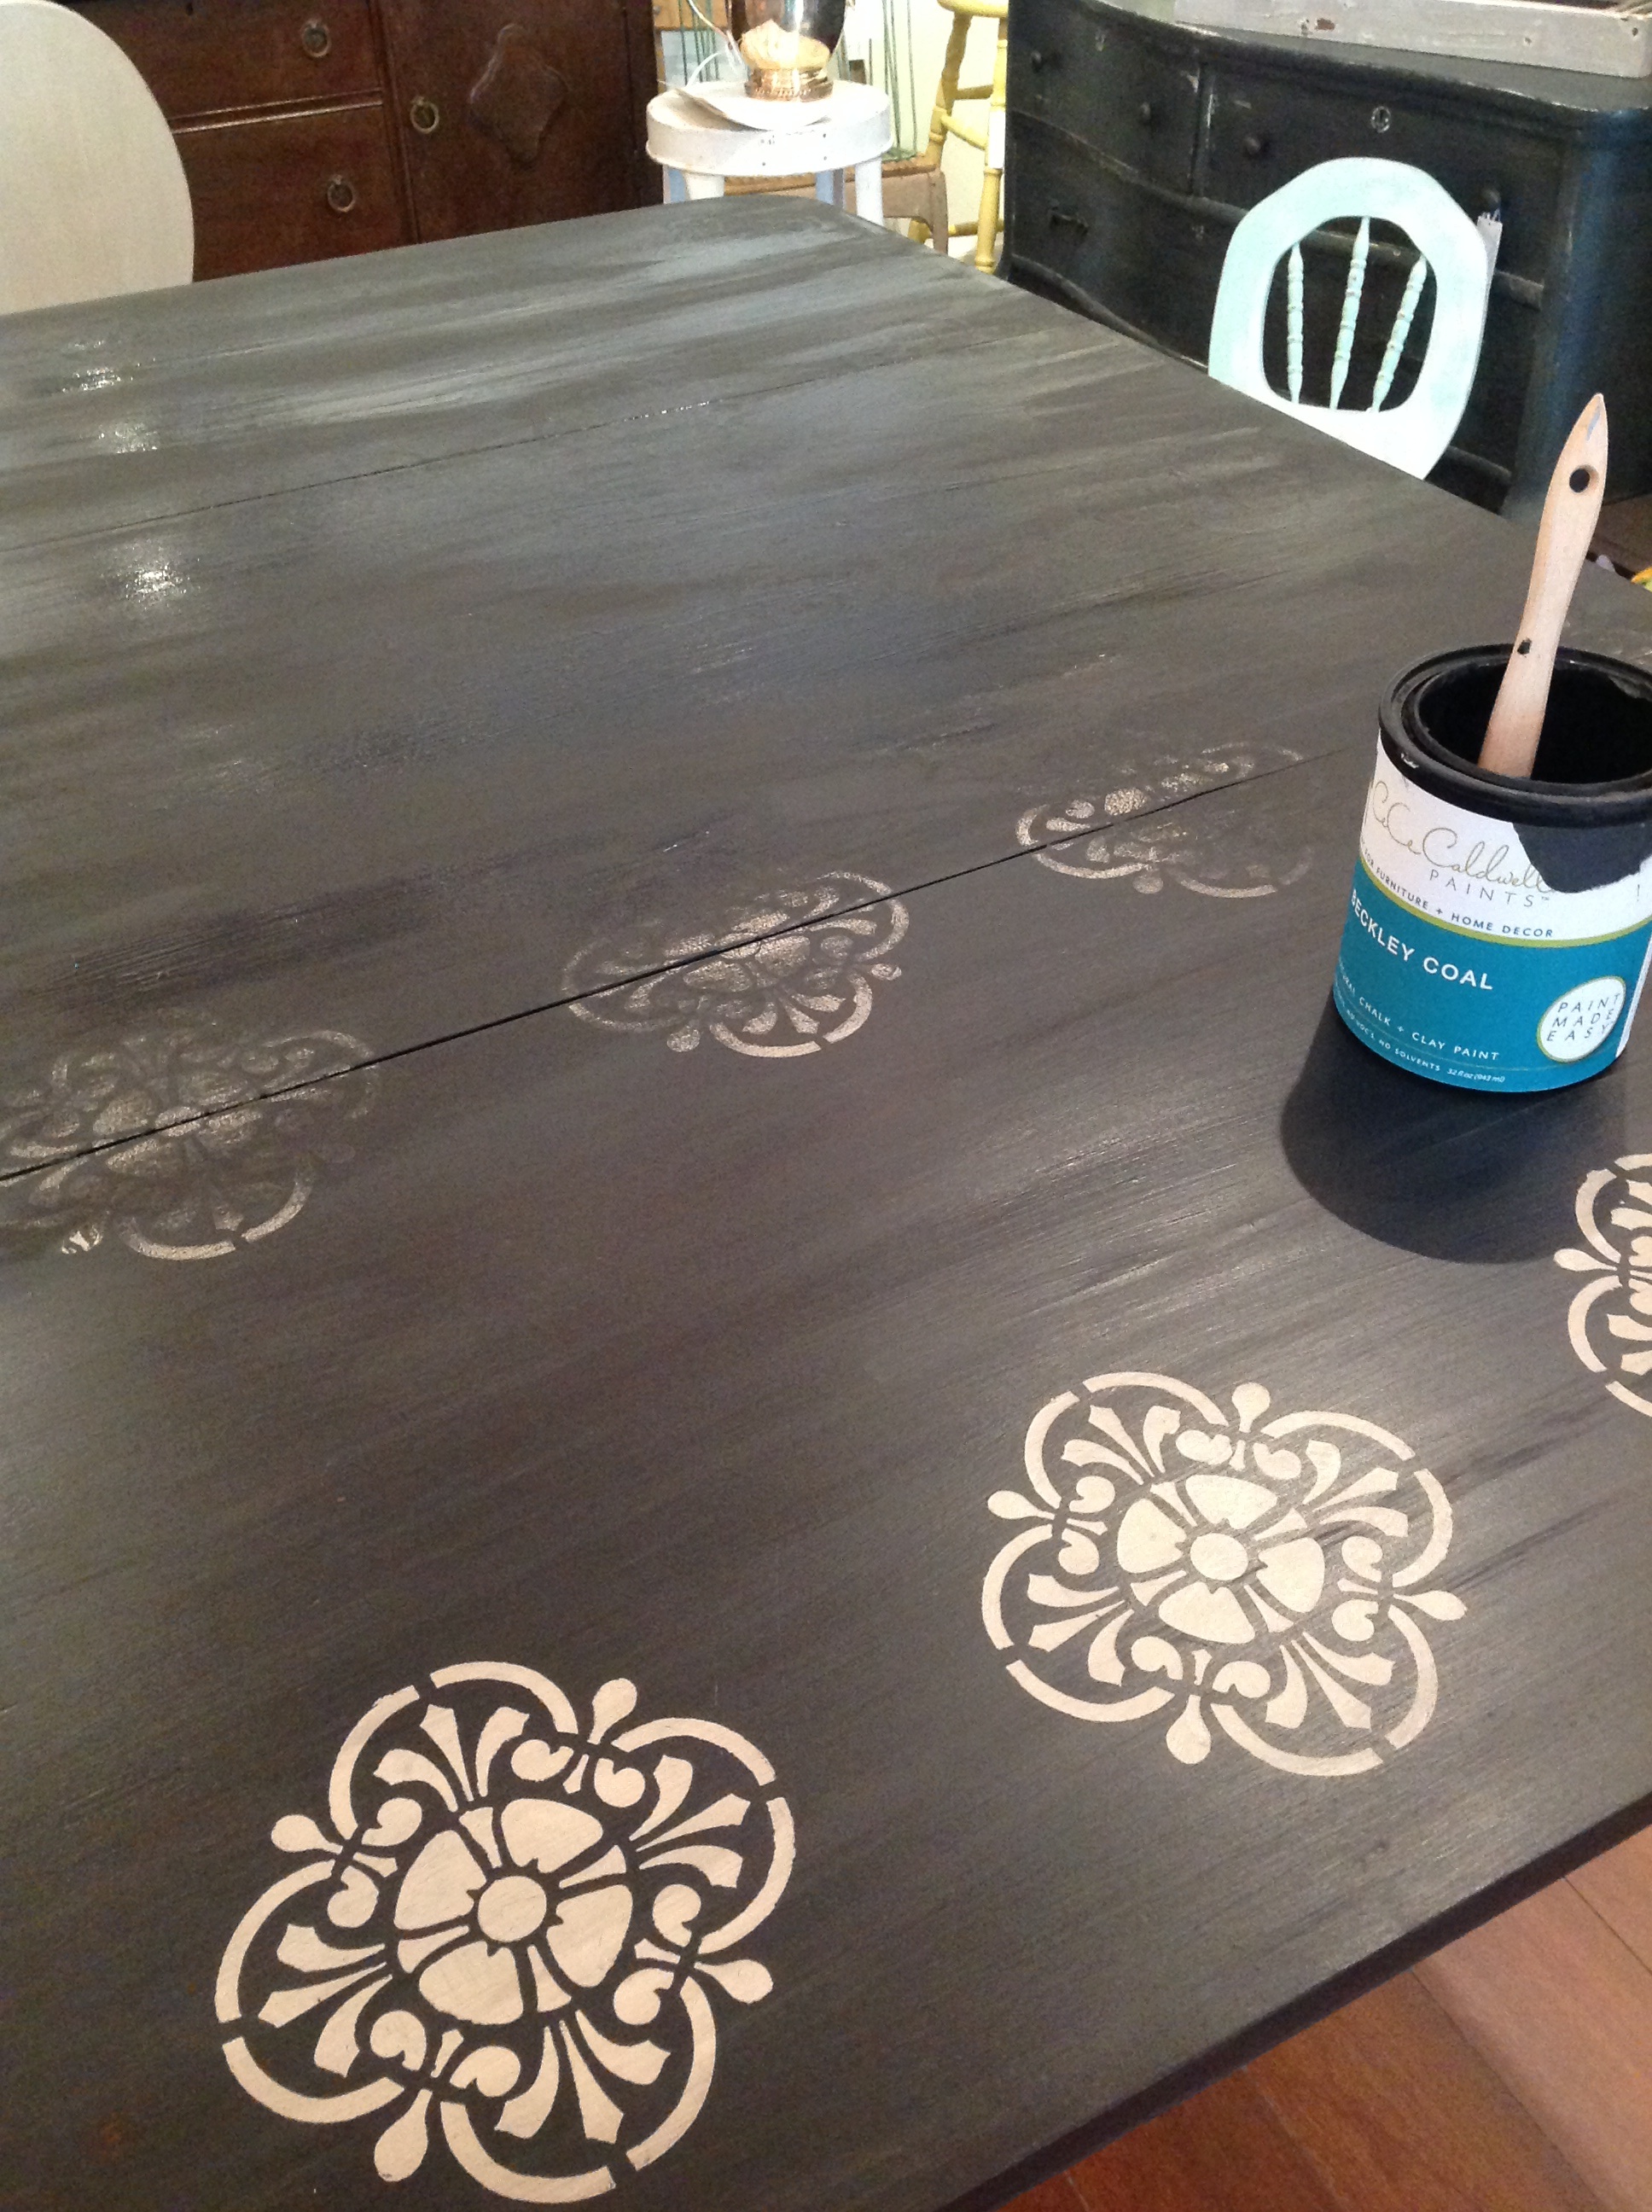
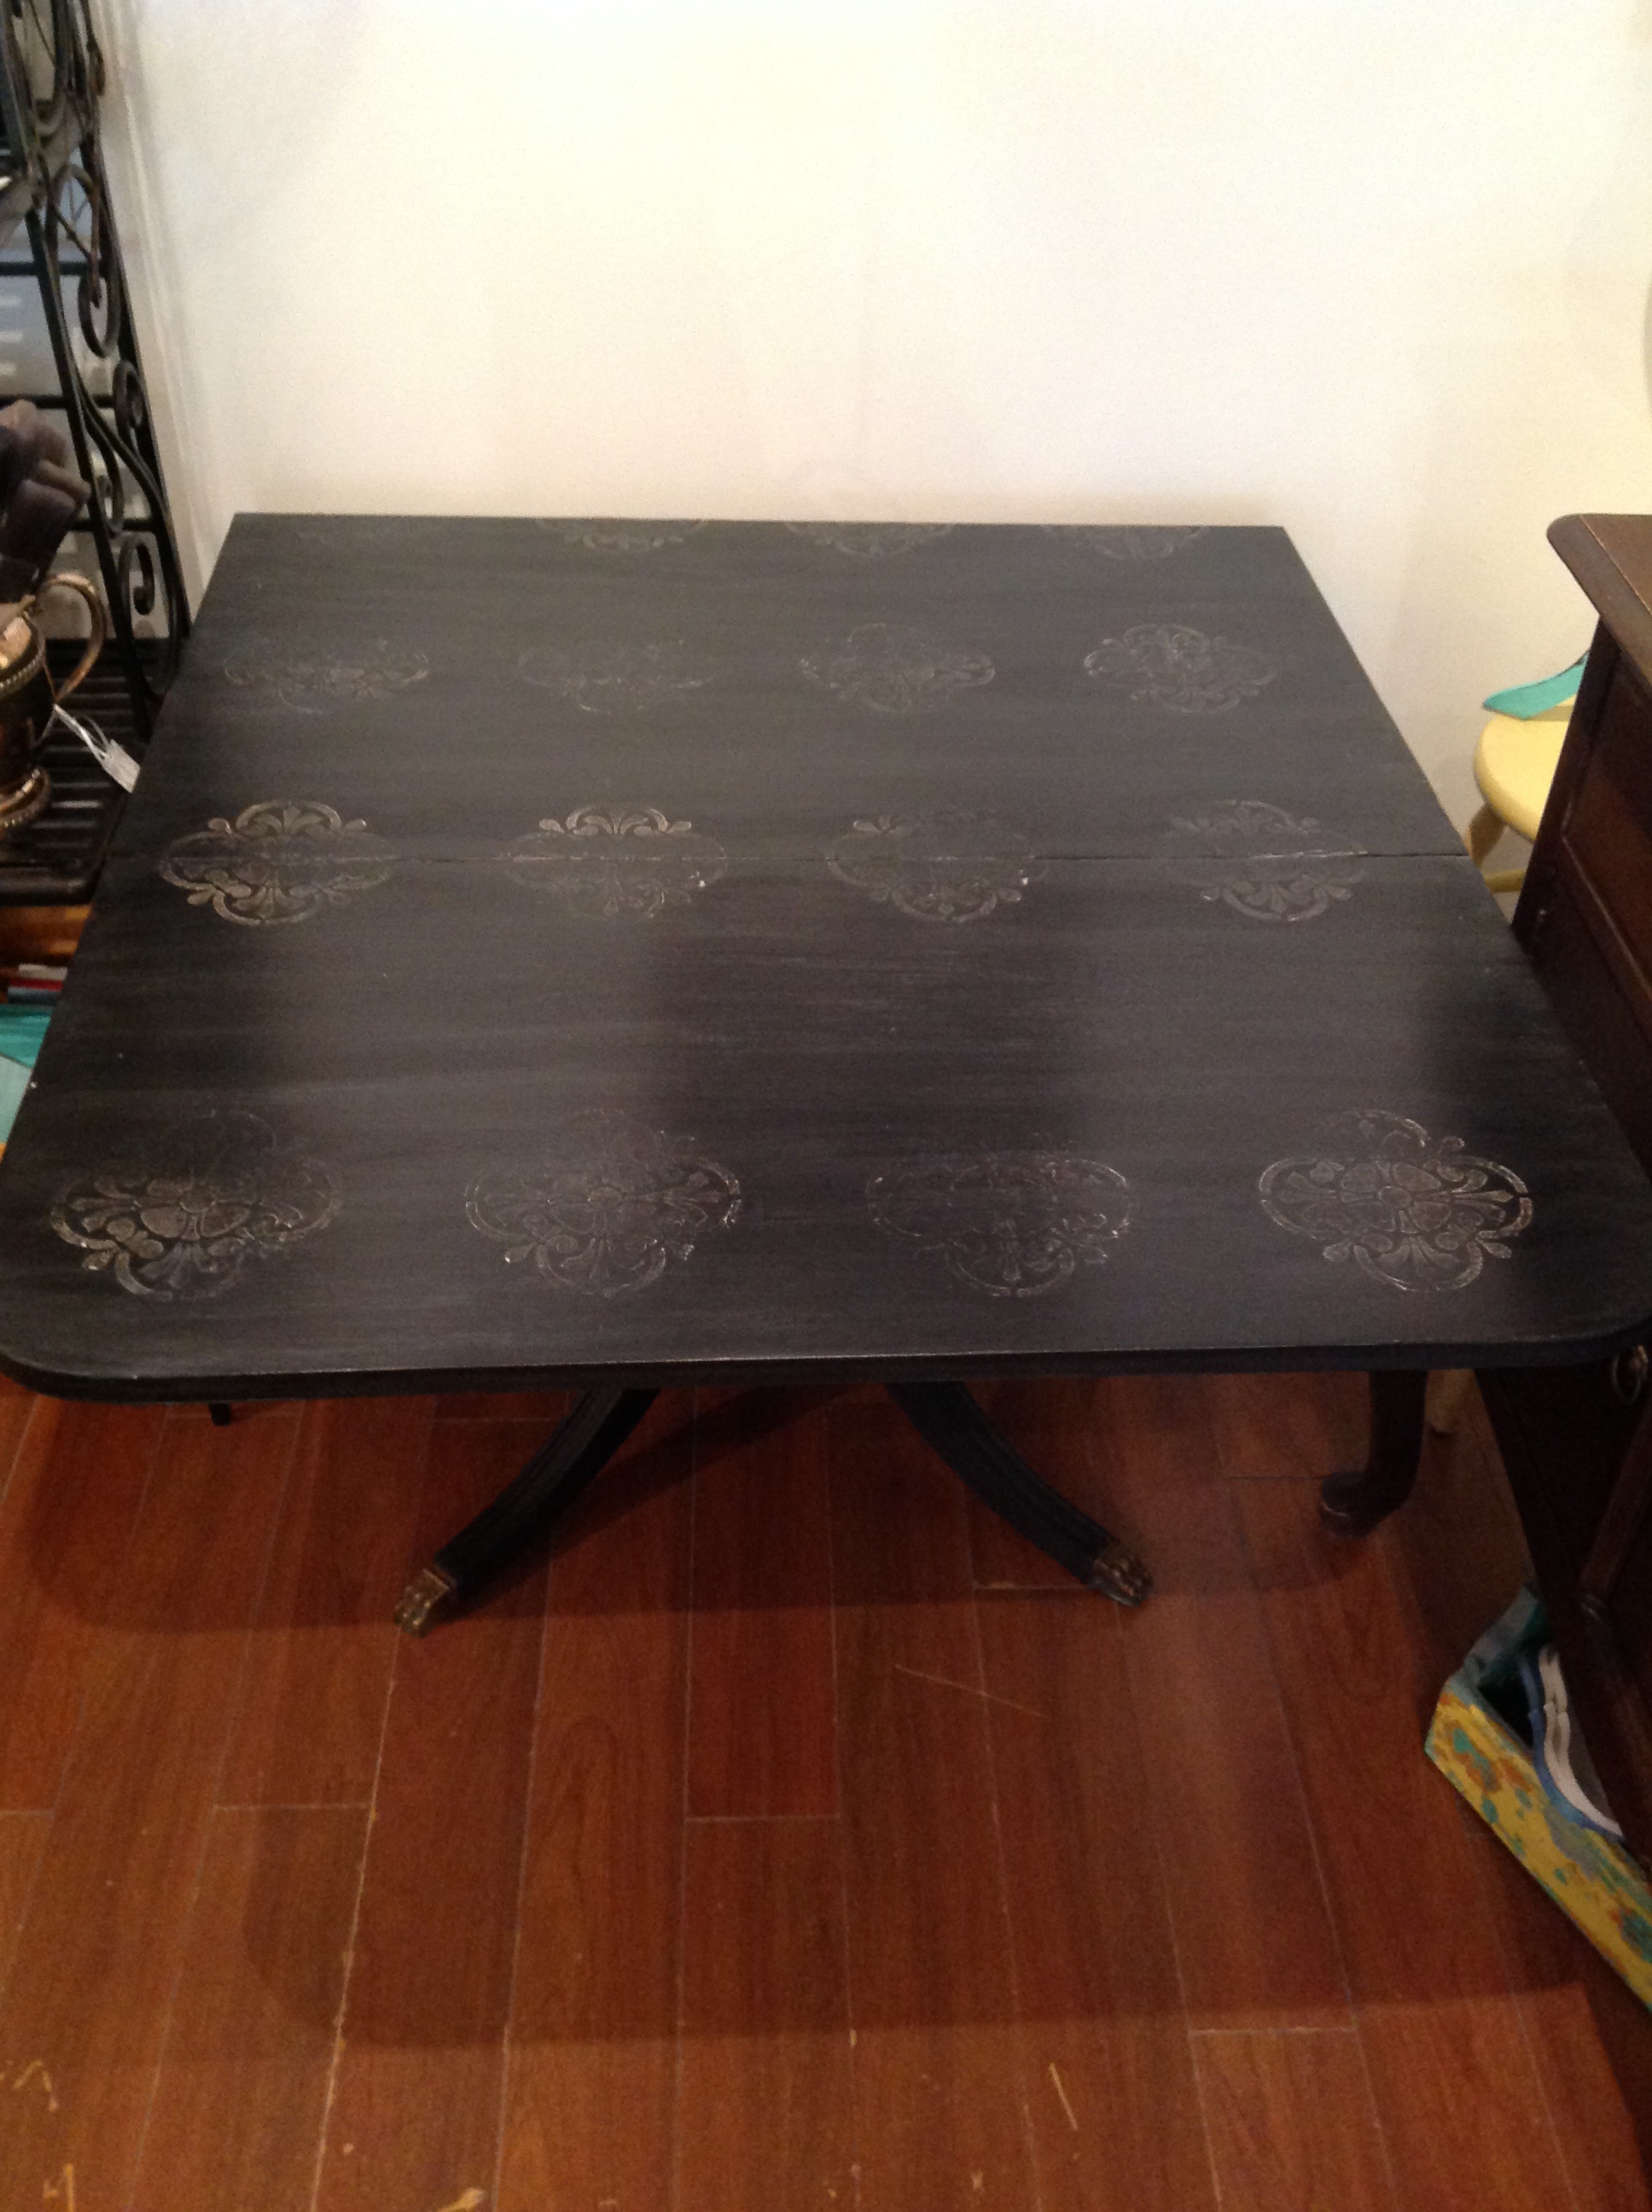
I slowly distressed it, showing the stencils underneath. I let it dry 24 hours before applying ENDURANCE. Endurance is Cece Caldwell’s hardest finish. It is used for table tops or anything you think it will get more wear and tear. It is LOW VOC’s. I normally apply two coats.
 I had to wait 24 hours for my paint to dry, before applying it. The can cannot be shaken; it needs to be swirled and stirred. After that, it needs to be applied in THIN layers! Yours truly kept getting a few “milky” marks… UGH. I have used Endurance before and never got “milky” marks! So I had to sand again very lightly. I removed the “milky” marks and applied it again VERY SPARINGLY. SUCCESS!!!! YAAAYYYY!!

The difference was that at first I was applying straight from the can, with a foam brush. So, I changed my strategy to putting the product on a paper plate with the foam brush, and very lightly applying it, then going over it with a staining pad (I got that at the hardware store). I guess my foam brush (from the dollar store) was taking too much product.
After it was all dry, I actually went over the whole table with Clear Wax (not necessary) because I wanted the top to be extra durable, but I wanted the feet of the table to be waxed… You know, we get these things in our heads, not sure why! Everything could be just finished with Endurance.
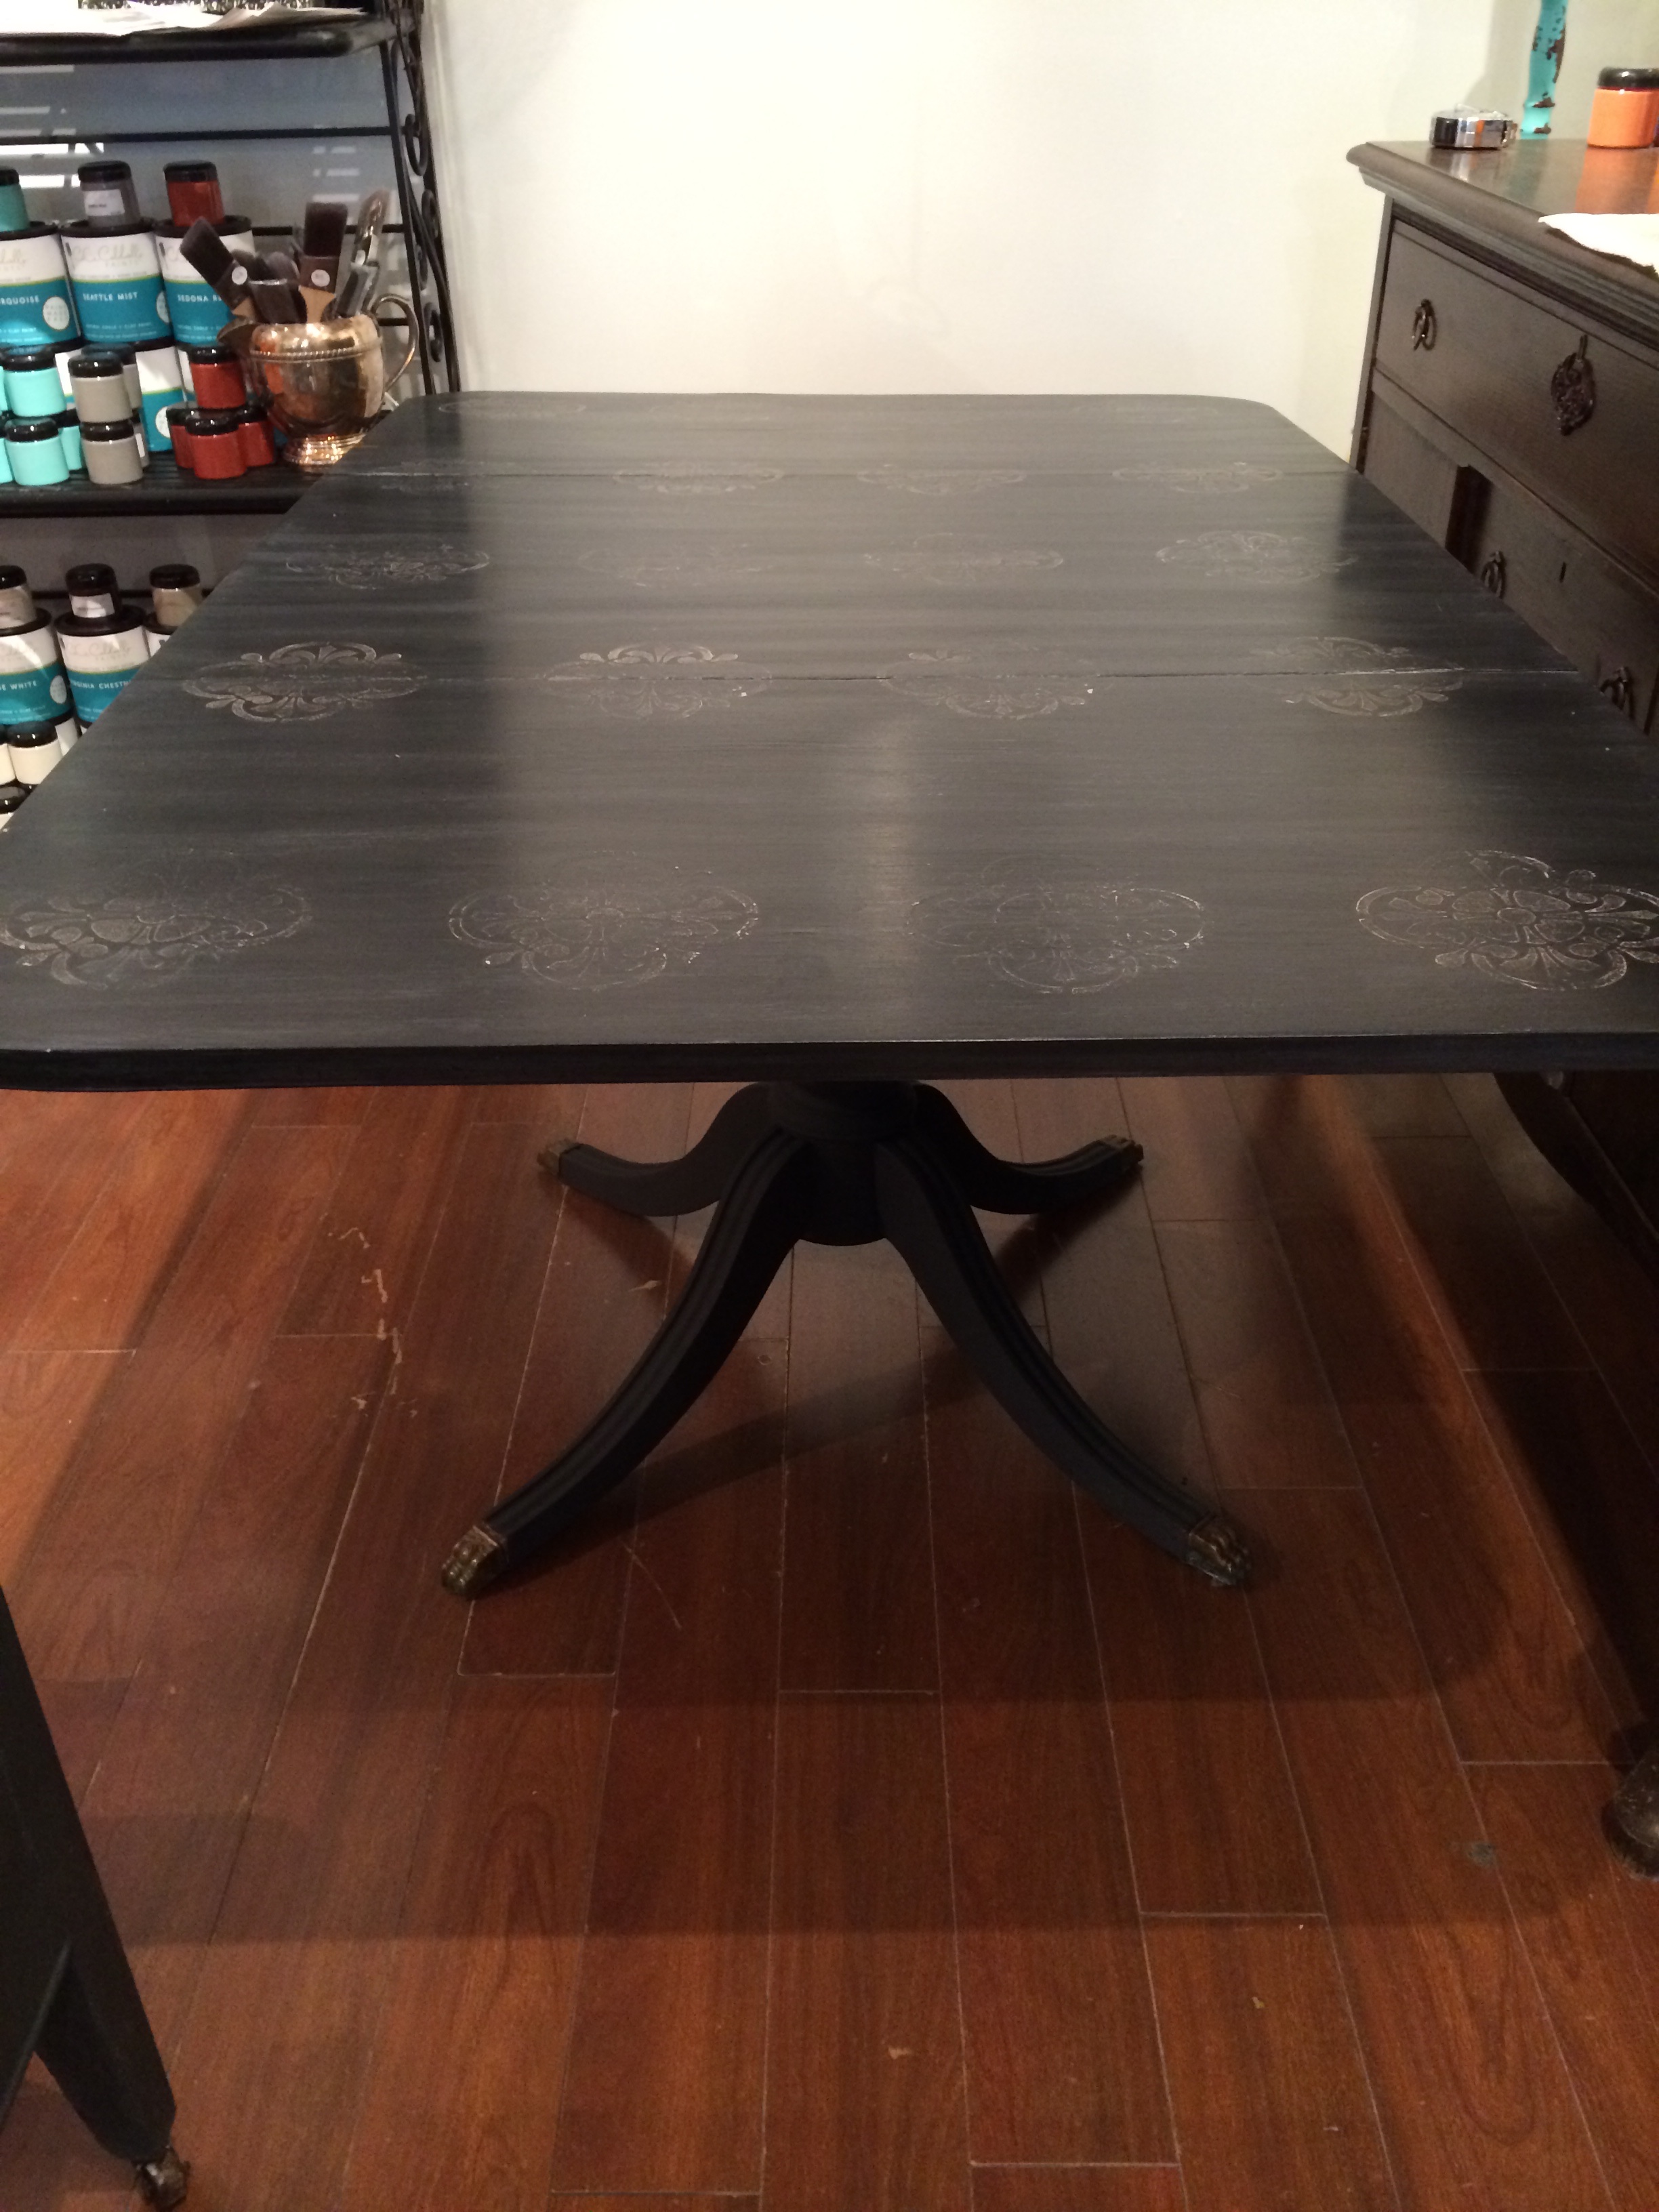
I hope you try this technique! It really reminds me of an old church floor in Italy… It would look great on my stairs… huuummmmm… Just created another project for my house!!!!
Please do not hesitate to contact me if you have any questions!
Happy Painting!
Claudine
P.S. I am sharing this technique at Fine Craft Guild!